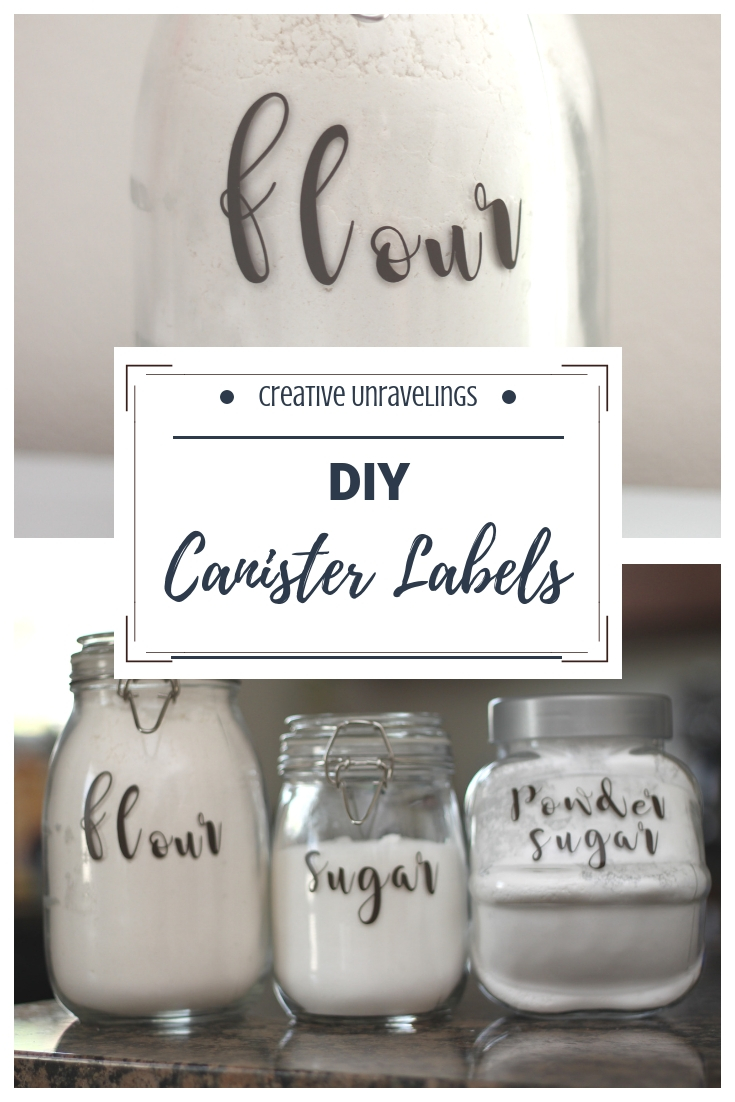
Today I am sharing with you my kitchen canister labels. Before I made these labels I had handwritten labels on what each canister was. It was time for an update! I decided to use my brown vinyl because it coordinates well with my kitchen.
For those of you who have access to the Cricut I am sharing my project file with you so that you can have these same exact canister labels.
Here is what you will need:
- Cricut Explore Air 2
- Cricut Design Studio
- 12 x 12 Cricut Mat
- Cricut Tools
- Vinyl
- Access to my Cricut Design file "Kitchen Canister Labels"
I first started out by selecting "canister" as my background image. Then I opened my first text box. The text box size was 72 and I was pretty happy with that size for my size canisters. After I typed in "flour" in my first text box, I selected "Magnolia sky." Here is the link to my project if you don’t want to have to recreate it. Note, the Magnolia font will not show up on your computer when you download my design so you will need to download the font for free online.
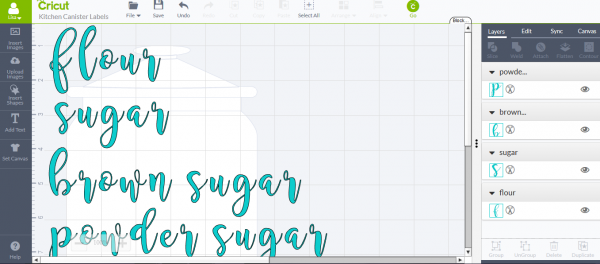 I continued on with the rest of the text boxes. Once I was happy with the size and presentation it was time to begin cutting. Remember to place the vinyl shinny side up ( or color up.)
After the cuts were completed it is now time to begin weeding your letters.

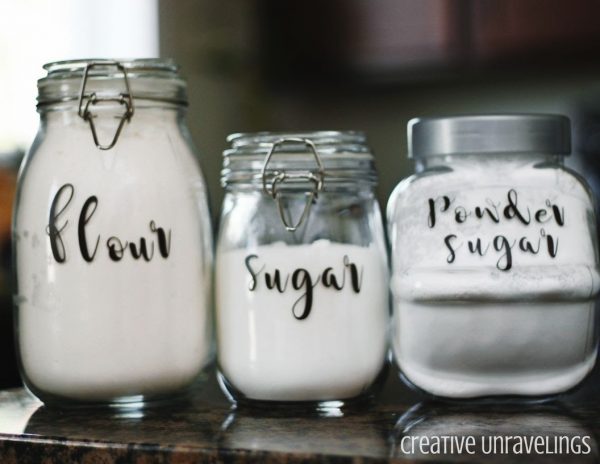
Last step, placing the vinyl lettering on the canisters. Its good to try and piece your word out as best as you can before placing them on the canister. I eyeballed it a few times and measured so that the word would be centered on my canisters.

 There you have it! I love the before and after! Don't you think the labeling really adds to the canisters?
Comments