 Teacher Appreciation Day is just around the corner! Its time to show our teachers how much they mean to us. This is technically my first year showing our appreciation for my daughter's teachers. I am super excited to share with you my creation!
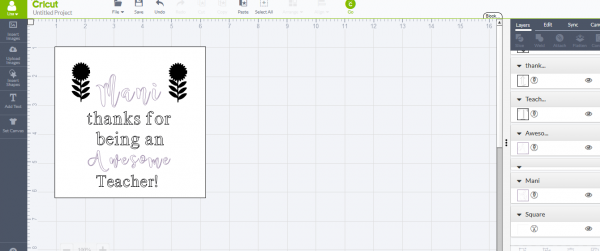
This is a Cricut Studio Design creation so in order to recreate this project you will need access to a Cricut and the Cricut Design studio.
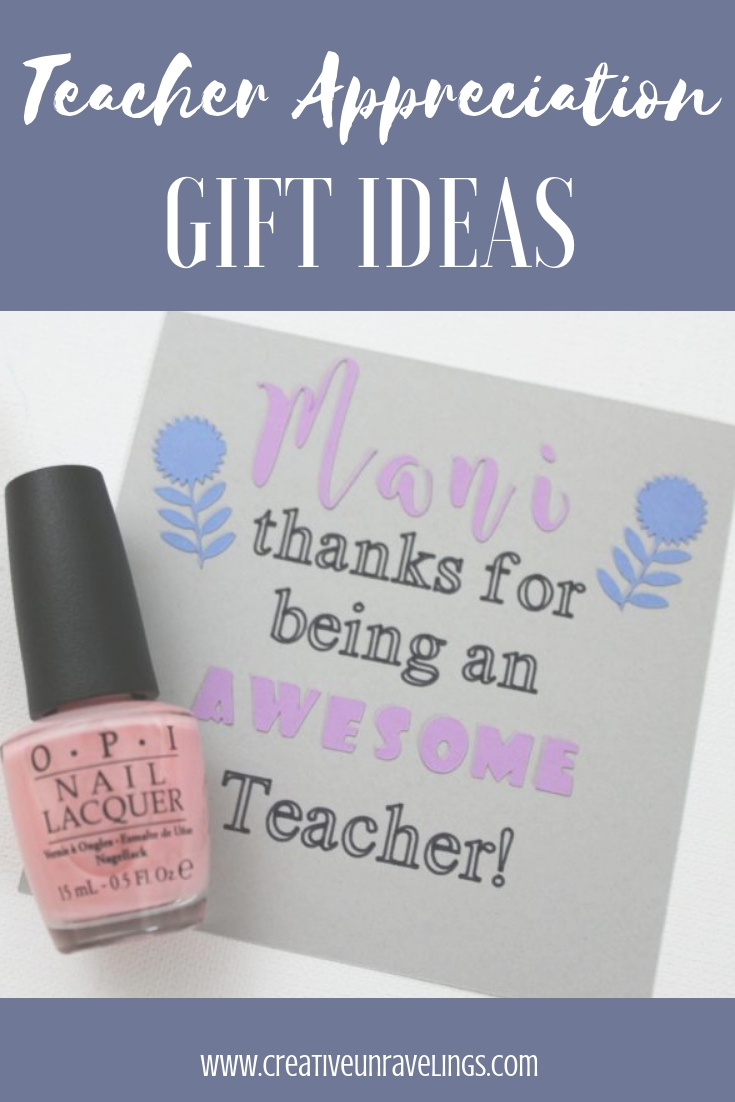
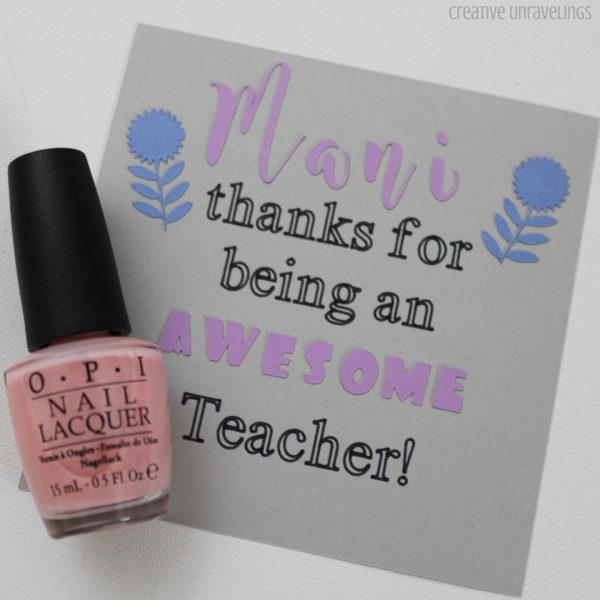
My daughters 3 teachers are the sweetest women. They tell me little parts of her day that I miss. They really take care of my daughter and that means so much to me. So in honor of "Teacher Appreciation Week," I wanted something personal for them. I didn't really want to go the candy or plant route. So I thought nail polish would be a nice touch. I saw the phrase "Mani Thanks," "mani" as in "manicure." I thought the phrase "Mani thanks for being an awesome teacher" would be the perfect saying for Teacher Appreciate Day. So to the Cricut Design Studio I went to create.
For this project you will need the following:
- Cricut Design Studio
- Cricut
- Cricut Tools
- Cricut Mat
- Cricut Black Pen
- Card Stock (your choice of coordinating colors)
- Nail polish to give as a gift
After I created the card layout and centered the words, I thought some flowers would add a nice touch to it. My plan was to have "Mani" and "awesome" in the different fonts and then "thanks for being an" and "teacher" in the same font.
 Here is access to my file of Teacher Appreciation Day Gift.
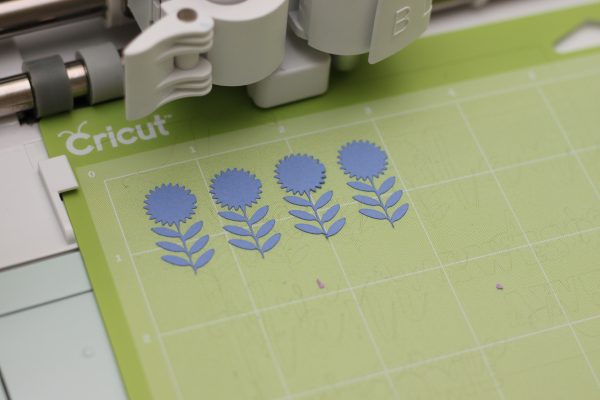
Aren't these flowers just too cute? Please note that I uploaded the flower image and since it is an uploaded image unfortunately it is not something that I cannot share. I had to remove the flowers in order to share my project.
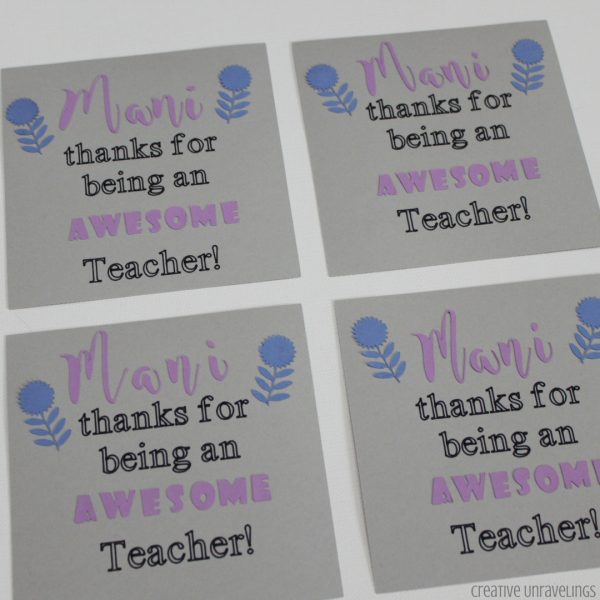
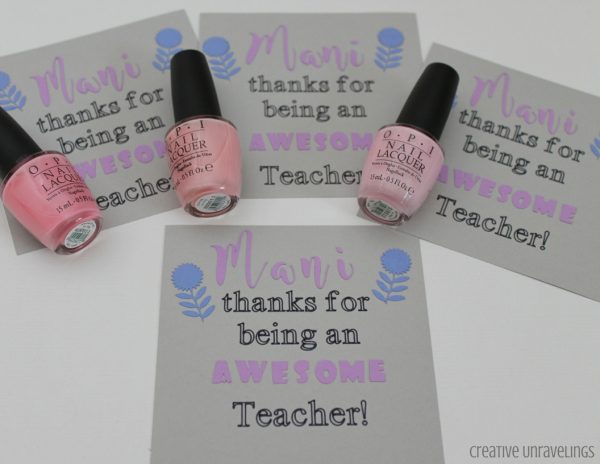
 I used 3 different colors of card stock. I made 4 cards, I only needed 3 but I wanted an extra one just in case.
For those of you that have access to my file and are ready to re-create my piece here is what you will need to do.
- You can setup your Cricut to Cut and then write, back to back. Start with the "base" if you are looking at my sample it would be the gray. You want to start with cutting the base card. Next, if you setup your Cricut correctly it will automatically write "thanks for being an" and "teacher"
- Then you to setup the Cricut so that it cuts "Mani" an "awesome" on the choice of card stock. I used the same color on those two words.
- Don't forget to take your time wedding your cut outs correctly.
- Unfortunately I cannot share the flowers with you. BUT you can upload your own image. Here is how you do that:
- Select "Upload Image" and choose what image that you want to upload.
- Then you will need to select one of the three options: "Simple image," "Moderately complex image," or "Complex image." You will have to base this on how complex you think your image is.
- Once you select your "Image type" you will click "Continue"
- Your image will appear on the screen and a gray and white checkerboard will be your background. Your image should have a white background. Select the wand like tool at the top left corner of your screen "Select and erase." and then use this tool to go in between the unwanted background areas of your image. You are basically removing the white background so that your image stands alone.
- Once your image is to your liking select "Continue" and then your image is now a saved image in your Cricut Design Studio! You can select your image from here and insert into your project.
- Now its time to cut your flower or choice of added clip art.
- Once everything has been cut and written out its time to start piecing together your card!
 We are so excited to give this little gift to our teachers, we are also going to spoil them with a little breakfast!
What are your favorite gifts to give teachers for Teacher Appreciation Day?
Comments